The library provides the class keypad::matrix↱, defined in “rpi-hw/keypad/matrix.hpp”↱, with which it is possible to manage keypads of any size.
Its constructor method takes two ordered lists containing the GPIO pins used by the device:
- keypad::matrix(
- { COL0, COL1, COL2, … }, // Column pins
- { ROW0, ROW1, ROW2, … } // Rows pins
- )
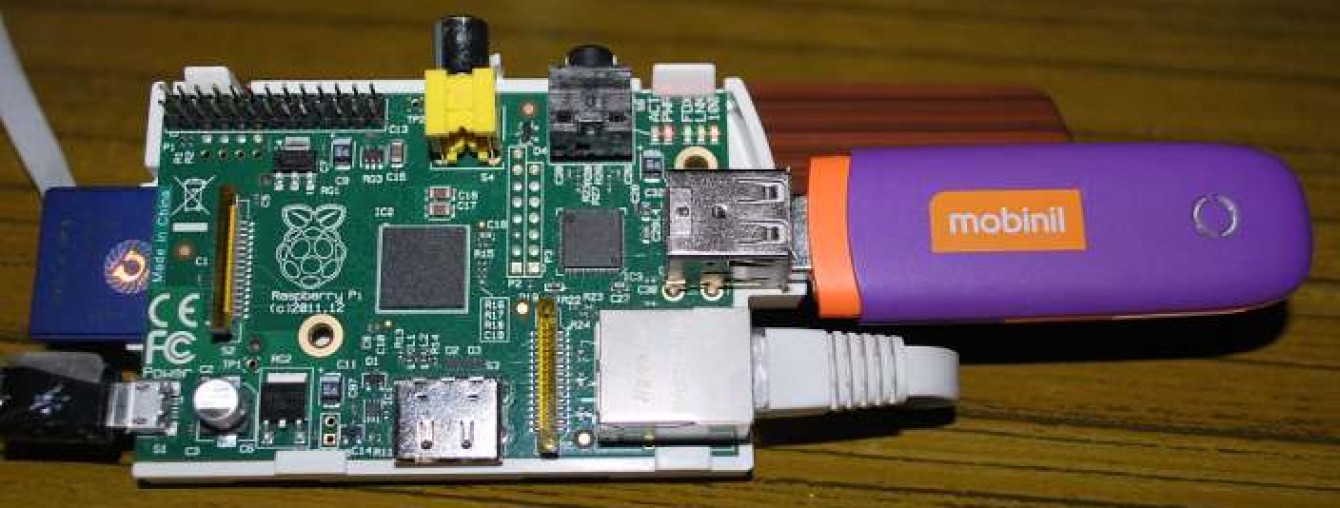
Let’s take an example. The following image shows how to connect the Raspberry Piwith a standard 12-key keypad:

We used the following GPIO pins: 21, 10, and 4 for columns; 22, 14, 15, and 17 for rows. This is the internal circuit diagram of the keypad (where pin names refer to the keypad connector):

The instance of keypad::matrix will check periodically which buttons are pressed, looking for connection between rows and columns. The control algorithm can be summarized as follows:
- Set all GPIOs of rows as input.
- Set all GPIOs of columns as output (low).
- Set a column pin to high.
- If one of rows reads a high value, then the button between those column and row is pressed.
- Set the previous column to low.
- Repeat from line #3 with another column, until there are no more.

And finally, here is a sample code that shows you how to read the state of some buttons in the 12-key keypad:
- #include <iostream>
- // Include Rpi-hw headers
- #include <rpi-hw.hpp>
- #include <rpi-hw/time.hpp>
- #include <rpi-hw/keypad/matrix.hpp>
- // Use Rpi-hw namespace
- using namespace rpihw;
- int
- main( int argc, char *args[] ) {
- // Matrix keypad controller
- keypad::matrix dev( { 21, 10, 4 }, { 22, 14, 15, 17 } );
- // Main loop
- for ( ;; ) {
- // Check some keys state
- if ( dev.pressed(0) )
- std::cout << “You have pressed button 0!\n”;
- if ( dev.released(2) )
- std::cout << “You have released button 2!\n”;
- if ( dev.pressed(1) && dev.pressed(4) )
- std::cout << “You have pressed buttons 1 and 4!\n”;
- // Wait some time
- time::msleep( 100 );
- }
- return 0;
- }
To compile it (or any other programs using the library) use the command:
- g++ `pkg-config –libs –cflags rpi-hw` <SOURCE> -o <TARGET>
A more realistic example that uses an Event Listener to handle a 16-keys keypad is the following:
- #include <iostream>
- #include <memory>
- // Include Rpi-hw headers
- #include <rpi-hw.hpp>
- #include <rpi-hw/time.hpp>
- #include <rpi-hw/keypad/matrix.hpp>
- // Use the Rpi-hw namespace
- using namespace rpihw;
- /*
- (14, 15, 18, 23) colums = 4
- ||||
- ———————-
- | (1) (2) (3) (A) |
- | |
- | (4) (5) (6) (B) |
- | |
- | (7) (8) (9) (C) |
- | |
- | (*) (0) (#) (D) |
- ———————-
- ||||
- (24, 25, 8, 7) rows = 4
- */
- /** The class of my application **/
- class MyApp {
- public:
- // Define the keymap
- std::vector< uint8_t > keymap = {
- ’1′, ’2′, ’3′, ‘A’,
- ’4′, ’5′, ’6′, ‘B’,
- ’7′, ’8′, ’9′, ‘C’,
- ‘*’, ’0′, ‘#’, ‘D’
- };
- /** Constructor method **/
- MyApp() : m_keypad( new keypad::matrix( { 14, 15, 18, 23 }, { 24, 25, 8, 7 }, keymap ) ) {
- keypad::T_EventListener listener = std::bind( &MyApp::eventListener, this, std::placeholders::_1 );
- // Add the keypad event listener
- m_keypad->addEventListener( listener );
- }
- /** Destructor method **/
- ~MyApp() {}
- /** A simple keypad event listener **/
- void eventListener( keypad::base &dev ) {
- const std::vector< uint8_t > &keystate = dev.keyState();
- for ( uint8_t c : keystate )
- std::cout << (char) c << std::flush;
- }
- /** Main loop **/
- void run() {
- for ( ;; ) {
- /* … */
- }
- }
- private:
- //! The keypad instance.
- std::unique_ptr< keypad::matrix > m_keypad;
- };
- int
- main( int argc, char *args[] ) {
- MyApp app;
- app.run();
- return 0;
- }
In this manner the keypad instance will call the method MyApp::eventListener to handle the input data.
You can find more information on the reference manual and on the wiki.
That’s all! Feel free to comment my work!
[Updated on 2013-10-22]
0 comments